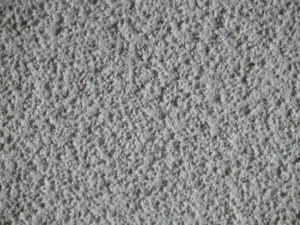
Trends come and go. That’s just how it is in the design world. One such trend that has come and gone is the popcorn ceiling. Also known as an acoustic ceiling, it was a staple of residential interior design through the 60s and 70s.
Popcorn ceilings often contained toxic asbestos and lead, in addition to being difficult to clean. In 1963 the US introduced the Clean Air Act, which banned the use of air pollutants in paint materials. Since then, the popcorn ceiling has fallen out favor with homeowners around the world.
Some homes still feature this curious design, and if your home is one of them, you may be wondering how to remove popcorn ceiling.
Read on below as we guide you through the process.
Safety guidelines
Before you begin, it’s important to establish safety procedures to prevent unwanted incidents.
Popcorn ceilings installed as late as the 1980s may contain asbestos. To make sure that your ceiling is asbestos-free, purchase and use a home testing kit. This will allow you to determine how much asbestos your ceiling contains if any at all. If the ceiling contains more than 1% asbestos, it may be best to employ a professional removal service.
Additionally, painted popcorn ceilings are more difficult to remove because paint prevents the texture from absorbing water, which is needed to loosen the gritty material. If you have a painted ceiling, you may need a chemical stripper to loosen the paint material.
In this guide, we will be teaching you how to remove unpainted popcorn ceiling.
Remember to wear a safety mask or respirator before proceeding. Turn off all power connecting to your heating and cooling systems, as well as any overhead lights or fans.
How to remove popcorn ceiling safely
You’ve reviewed the safety precautions and now you’re ready to start working on your ceiling.
The first step is to clear the area of any furniture and appliances. You’ll want the clearest space possible because debris may fall in the removal process.
Next, cover the flooring with a few layers of newspaper and secure it with tape. Similarly, cover the walls with plastic and tape them down.
tCrack open a window or two to keep the area ventilated. This is especially important if you or someone in the family has respiratory issues.
Depending on the height of your ceiling, you may need a step ladder to be able to work properly. Once that’s in place and you’re wearing your safety gear, you may proceed with scraping off the popcorn ceiling.
There are two ways to do this.
Two ways to remove popcorn ceiling
The first is dry scraping, which only means scraping the ceiling without moisture. This will take longer, but it may protect the underlying drywall from damage.
To do a dry scrape, work on your ceiling a few square feet at a time. Make sure to scrape evenly, and be careful not to go harder than you need to.
The second way is wet scraping. To do this, you will need water and a small amount of liquid soap. Spray only enough of the solution on your ceiling to loosen the textured material. Applying more than you need may damage the drywall.
Wait around 20 minutes to fully saturate the ceiling, and then start scraping. Continue spraying and scraping until you reach the desired smoothness for your ceiling. The corners of the ceiling are trickier to work on, so use a small putty knife to remove debris carefully.
When you’re done, you may see imperfections on your ceiling that you haven’t noticed before. This is because popcorn texture can hide flaws in the ceiling. If necessary, you can paint over the ceiling for a fresh look.
It’s that simple. It may take a day or two to remove popcorn ceiling, but with some patience and persistence, you’ll be able to drastically change the look of your home.